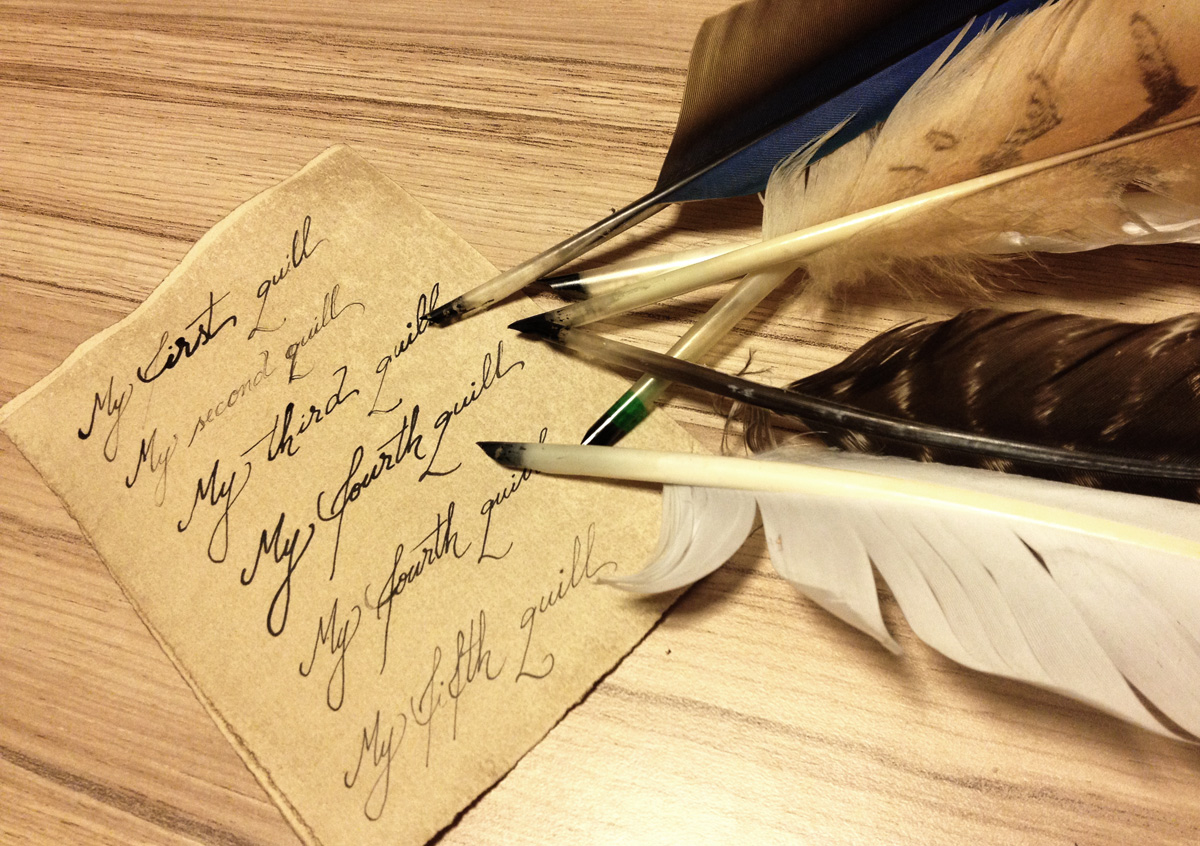
Many types of feather can be used to make a quill pen. The most popular is probably the goose quill. The goose quill is thick enough to be cut cleanly to provide a good nib. It is also large enough to sit comfortably in the hand.
Before you start to cut your nib decide whether to trim off the plume. If you like the look of the plume then feel free to leave it but remember that it can get in the way and make the quill harder to use.
There are plenty of illustrations from history that show scribes using stripped quills and others showing quills complete with plumes. It is entirely up to you.
The first step is to dip the tip of the quill in boiling water to make it soft enough to cut without shattering. After a minute or two the quill will become quite soft (rather like a fingernail).
Make your first cut horizontally across the end of the quill. Now make two diagonal cuts to form the point of the nib. Next make a cut (about 10mm long) from the point toward the “handle’ of the pen. This allows the ink to flow freely. Another cut across the tip of the nib will determine its width.
The final tasks are to clean up the nib, to remove any detritus, fluff and other unwanted fuzzy bits, and to cut it down to size. There are examples of full length feathers being used by scribes but they can be a bit unwieldy. You may also like to use a small piece of very fine sand paper to smooth off any rough edges.
Using a quill pen
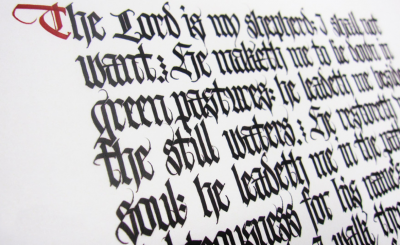
Practise on thick, rough textured water colour paper before venturing onto expensive vellum. Water colour paper behaves in a similar fashion to vellum and will allow you to gain a high level of “nib control’ for a minimal cost.
Vellum is a relatively unstable surface to work on. It absorbs moisture very quickly and can wrinkle and bow alarmingly. It does however provide an authentic and attractive look to your work. The solution is to simultaneously dry and flatten damp vellum. This returns the material to a flat state and makes it suitable for writing.
Think about how your finished design will be laid out and mark up the material you will be working on accordingly. Lightly scoring lines across your page and adding margins using a ruler will keep your text on track. A set of sharp pointed dividers from a geometry set will allow you to mark out the line spacing accurately. You might also like to place a sheet of paper between your wrist and your writing material to guard against marking the surface by mistake.
Once you know how your lettering will be arranged you are ready to begin. Carefully dip your quill into your chosen ink. Be careful not to overload the nib. Only load enough ink to do a couple of letters at a time or you risk blots and drips. Remember: Calligraphy takes time and patience. Don’t rush as ink can take several minutes to dry.
Always use separate quills for different colours. It is almost impossible to clean a quill effectively and it would be a shame to spoil good work for the sake of a few minutes work cutting a new quill.
Correcting mistakes
You can correct mistakes in your work by gently scraping the dried ink from the surface of the vellum or paper. Alternatively, a neater and more traditional option is to underline a mistake in red to indicate an error. You may feel this is unacceptable for some purposes.